

No Biggie! How to Paint 42mm Figures
- Piotr Stolarski

- Feb 15, 2023
- 7 min read
Updated: Feb 23, 2023

‘I only use old school figures nowadays - takes me back to my childhood. When I couldn’t ever afford them’ – Leon Bovril, ‘Cocked! The Ladybird Book of Wargamers’ (2019)
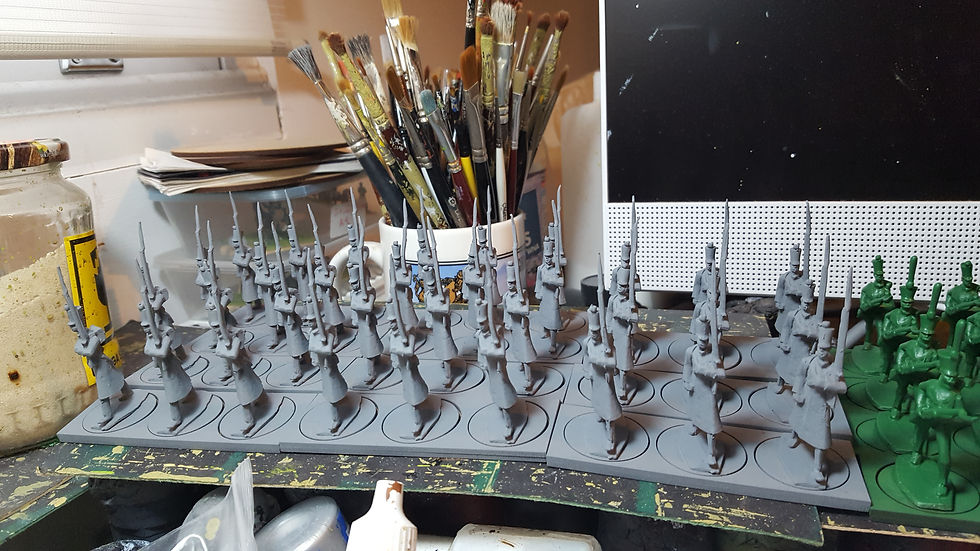
I have been painting 40/42mm figures since 2020 for my Polish November Uprising (1830-1831) collection, which will be getting a run out at a big game in May at the War Room. This post, using Spencer Smith miniatures, will cover how I go about painting infantry, offering practical tips on what may be a daunting process for the uninitiated.
Sourcing the Figures
40-42mm figures are a thing! Funny how 28mm figures seem to shrink in size as we get older. And while I cannot claim a personal link to a past golden age when large toy soldiers were part of my childhood, the appeal of 40mm is in their heft and “old schoolery” apart from just being something a bit different.
I have used mainly Napoleonic period figures for the November Uprising, including ones from Irregular Miniatures, Sash & Saber 40mm, Spencer Smith, and Perry Miniatures. They are not cheap, but they are fun to paint up and do look great on the tabletop. The question is, how to go about painting them?
Dallimore or Toy Soldier?
Do you want to go down the route of Kevin Dallimore, a professional figure painter, who uses shading extensively, or would you rather prefer a simple "block-painted" Toy Soldier look? I tend towards the latter approach myself, because it is quicker and can look just as good.
From experience, I have discovered that “realistic” painting is time-consuming but not noticeable in games (and sometimes looks overdone), whereas a neat basic paint job is both achievable and satisfying. However, I sometimes use black outlines or basic dry-brushing to pick out details on my figures, so in practice I go somewhere between the two approaches.
Preparation

The figures I use barely have any flash, but that can be removed using cuticle nippers (the best multitool in wargaming in my experience!) - widely available online. I never wash or clean my figures because I have never seen any benefit in doing so. It is also time-consuming.
Assembly and basing

Irregular Miniatures' figures in this scale are one-piece castings. Sash and Saber 40mm and Spencer Smith require heads to be glued in (I use super glue, sometimes placing a tiny ball of blu-tack in the neck socket to hold the head-spike in place).
Next, I glue down the figures on their bases. This will depend on what base size you have gone for (I use 2p MDF pieces glued into 3-slot MDF sabot bases (both from Warbases), for my infantry figures; 3 to a base – 4 bases (12 figures) to a battalion).
I decided on this base size for sake of manageability and aesthetics. There is nothing stopping you choosing another basing size or style, such as individual bases for magnetic sabots for example. 2x2 figures or 2x3 figures on a base is also possible. But neither was a road I wished to go down, preferring the option of a single-rank formation.
The thickness of the base will also affect aesthetics - I use fairly thick bases for 42mm infantry, and movement trays for both infantry and cavalry, which add further heft - appropriate for the scale.
In terms of the mechanics of basing, I used to paint figures temporarily mounted on paint pots, but now just glue them to their bases. This saves time, and means you can hold the figures easily by their base.
Paints and Brushes

I use acrylic paints for all my miniatures. I used to use Citadel Colour from Games Workshop extensively, but these are now unaffordable for the volume of paint (12ml) you get. I now use “Miniature Paints” which are just as good and at 30ml a better bet (they are available from Magnetic Displays online or at their stands at wargames shows).
Brushes do matter. From experience of buying lots of poor-quality brushes just to save a few quid, I can testify to the frustration when they never keep their points or sprout “side-hairs”. I would recommend buying and using quality Sable brushes for detailing (cuffs, collars, faces, hands, etc.), but others of lesser quality for blocking in colours, flat-heads of different sizes for dry-brushing or painting bases, etc.
Undercoating? No!

Over the years I have transitioned from always undercoating in black, to now just spraying the figures on their bases in their main uniform colour. I use sprays designed for miniatures, but also car spray paints, and now use them for all scales of figures. These sprays are best sourced online on Ebay for value, but you can get them at shows or at B&Q too.
Since abandoning black undercoats, I also no longer bother with shading or building up lighter and lighter shades of colour on figures. With block-painting, the key is to provide a main-uniform colour canvas. Much of this canvas will be painted over in other colours. The remaining parts of the uniforms are then painted, and the effect can be very good (as well as quicker and easier than “Dallimoreing”).
I have a cheat for creating some depth. When a figure has a red main uniform colour, initially spray a darker red or brown; when the uniform is white, spray a cream or grey. This will provide a ‘shadow’ or outline once the brighter colour is painted on to the main uniform. This is especially useful when the figure is mainly white, allowing you to pick out uniform and cross-belts as separate entities.
Do Your Research

Historical uniforms obviously need to follow history. Of course use the internet for this, but also books and magazine articles to get the correct uniforms and flags, etc. Unless you are doing Imaginations! If painting historical units, I tend not to paint the “Regiment von Lemberg” but identify the most frequently used uniform/facing colours, then switch these up to add variety as I paint up more units.
Patience and the Factory Method
When block-painting you need to remain patient and positive. The figures start out being a monochrome sprayed entity that may look daunting. The key is to proceed through the different parts of the model and add paint while utilising the ‘factory method’: paint all the headgear first on all the figures (for example), then move on to the trousers, etc.
Muskets

Paint the muskets dark brown. Later, use a silver paint to apply a barrel to the top edge of the musket and also a bayonet if there is one.
Trousers, Headgear, Flesh

Paint the trousers white (or whatever), then usually black for the shako. The latter may have a shako badge, pompom, or may be in a black or tan/beige shako-cover. Paint on as much detail as you wish. The white trousers may require a second coat for proper coverage.
I used to use “Kislev flesh” from Citadel, but this is now unaffordable, so I use “Ungor flesh” from the same people. Literally slap on the flesh-coloured paint to the face and hands, ensuring good coverage, and keeping to the relevant area.
Detailing – backpack, collars and cuffs, bayonet sheaths, pouches, shoes, hair

Block-in these areas in appropriate colours. Napoleonic/November Uprising-period bayonet-sheaths are sometimes silver but often black with brass/gold tips. A dot of gold colour will detail a plain black ammunition pouch nicely. I usually use black for hair (behind and beneath the shako) but sometimes use brown or yellow for moustaches/facial hair for variety.
Final touches - faces and hands, cross-belts, backpack straps, pouch straps, musket straps
Having blocked-in these areas, use a thin brush to apply black paint to the eyes and mouths of the face, and paint thin lines on the hands to distinguish the fingers. In my opinion such neat detailing brings the figure to life without you having to paint a “realistic” face.
I paint the remaining details neatly white on the model.
Rectifying mistakes
As you add the areas block-painting style, you will perceive that the figure is taking shape nicely. You will also notice mistakes. You will have to go back before basing to re-touch areas where paint has ended up in the wrong places or where it is missing. White areas in particular may need a touch more paint to ensure proper coverage.
Decorating the bases

I superglue fine sand (available from Early Learning Centre) to bases, before painting the whole base – including edges – a light-green/sandy colour. For this I used to use “Ogryn Camo” from Citadel, but have now switched to a mix of “Sea Green” and “Sand” from Miniature Paints.

When dry, I drybrush a sandy-coloured paint lightly to the base, then finally a second and even more delicate white drybrush. This process helps to form a 3D looking base, ready for the final stage: supergluing static grass in clumps. I find that circular clumps work best in a variety of locations, and I avoid adding too much of the grass.
Varnishing

Your painted figures are ready to varnish. I like gloss varnish, which I find looks nice and protects well from wear and tear. Most gamers prefer matt varnish, but for a “toy soldier” look, gloss is preferable.
I used to use artists’ varnish (Winsor and Newton), but the cheapest option I have recently come across is varnish from Minibits, available online and at shows.
It is important to wear protective eye gear (e.g. builder's goggles) when spraying or varnishing: the fumes or back-draft of paint/substance can otherwise ruin spectacles. A mask is advisable particularly if spraying in an area which is not well ventilated.

To spray, place your bases on an inverted cardboard box lid. Set up the lid outside in your garden if possible. Spray in frequent short bursts while moving your hand across the lines of figures at a distance of 8-10 inches. Turn the box three times so that a different side of the figures is facing you each time and repeat the process every time you turn the box.
Allow at least six hours for drying, ideally in a shed (never indoors as it stinks up the home). If you apply too much varnish, figures can take longer to dry, but will always eventually do so if you leave them open to the air. Try to avoid placing sticky figures in air-tight storage boxes; let them dry in the open instead (it can take a few days or so).
Conclusion

So there we have it. 40/42mm figures are like any other kind of figures. Paradoxically, despite being larger, they do not need extra attention or over-painting, to look really good on the tabletop using “old school” block-painting techniques. Which is how they were originally painted in their hundreds by balding ex-servicemen sporting cardigans and pipes!


Comments